Jeni says:
I just thought I would log in and quickly add a recipe, so we would have something on our recipes page.
This beef vegetable soup recipe is one of my favourites, because it tastes great... but also because it is so quick and easy to make. It is kind of cheating... but you can count it as homemade, and no one will ever know.
I made it for dinner tonight. I was scheduled to work the 1pm to 9pm shift, but we have a pretty big snow storm in our area today, and everyone who lived out of town was sent home early. So I got in at around 6, and put on a pot of soup for dinner. It is nice to have a nice warm pot of soup on a cold snowy night!
Here is the recipe:
1 carton of Campbell's Beef Broth
1 large can of diced tomatoes
1 medium sized steak, cut into pieces
-or-
1/2 pound ground beef, rolled into small meatballs
about 1 cup diced vegetables (what ever you have in the fridge)
1tbsp steakhouse pepper spice mix from Clubhouse (or your favourite brand)
Just mix it together, boil until vegetables are tender, and serve.
Thursday, 19 January 2012


SNOW!
Julie Says:
I just wanted to share a picture of the yard today. We have gotten soooooo much snooooow this week, and they are calling for another 15 cm tonight. I think its a good night for staying in and drinking tea!
I think they are even getting some at Jeni’s house today, and they usually don’t have a lot!
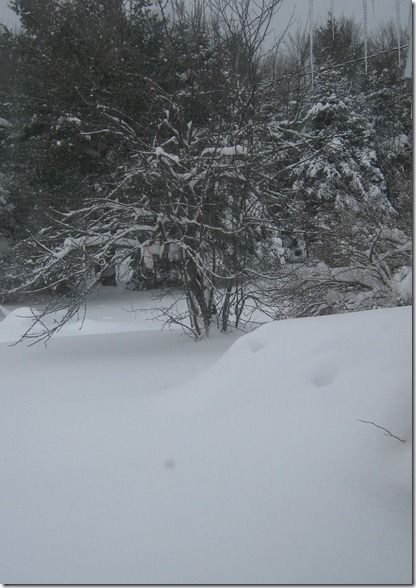
I just wanted to share a picture of the yard today. We have gotten soooooo much snooooow this week, and they are calling for another 15 cm tonight. I think its a good night for staying in and drinking tea!
I think they are even getting some at Jeni’s house today, and they usually don’t have a lot!

Thinking of Valentines Day
Julie Says:
The other day I stitched these cute teabag characters snuggling with their strings wrapped around each other. I intended to use them as part of a patchwork tea bag wallet. I found some really cute teabag wallets on several blogs and thought it was a great idea. However, I misjudged some measurements ended up with a bit of a mess.... well not really a mess, but not what I intended either. So, now I have to rip some seams and do some touch ups. I thought I would share the embroidery with you in the mean time, as it is cute for Valentines Day coming up. :)
 Also, while I had the needle threaded, I did a little doodling....

The other day I stitched these cute teabag characters snuggling with their strings wrapped around each other. I intended to use them as part of a patchwork tea bag wallet. I found some really cute teabag wallets on several blogs and thought it was a great idea. However, I misjudged some measurements ended up with a bit of a mess.... well not really a mess, but not what I intended either. So, now I have to rip some seams and do some touch ups. I thought I would share the embroidery with you in the mean time, as it is cute for Valentines Day coming up. :)


Saturday, 14 January 2012
Boy.... What a week!
Jeni says:
So, I decided to take up blogging the same time as I started into several other projects!
I am working on a new website for my inlaws Campground. The old one is ancient, and really needed updating. It isnt finished yet, nor is it online yet, but I will be sure to post the link once we get it up and running. Hopefully it will be good to go by the end of the winter, and ready for when the campground to open in the spring.
I also volunteer for the Cobourg Museum Foundation, and am helping to plan and open the Sifton Cook Herritage Center this spring. We have had quite alot of things come up latley that need attention, as we are comming closer to the Grand Opening in June, and still have piles to do. I won't go into too much detail, because I am sure I will write about it again as things progress...
Now, I did mannage to sneak in something crafty... I got the opportunity to make some doll clothes. My boss's daughter got a new American Girl Doll for Christmas, and she wanted some new clothes for it. So I spent my day off sewing a very cute doll jacket, hat and boots, all trimmed with pink pom-poms. I delivered them the other day, and today I got a card from Kailey to thank me for the outfit. It was cute, and I am a little suspicious that she spent as long on making the card, as I did making the outfit! I scanned the card to share it here.


 I am not sure what is up next for me... I have opened an etsy shop, and am looking for great ideas to fill it up!
So, I decided to take up blogging the same time as I started into several other projects!
I am working on a new website for my inlaws Campground. The old one is ancient, and really needed updating. It isnt finished yet, nor is it online yet, but I will be sure to post the link once we get it up and running. Hopefully it will be good to go by the end of the winter, and ready for when the campground to open in the spring.
I also volunteer for the Cobourg Museum Foundation, and am helping to plan and open the Sifton Cook Herritage Center this spring. We have had quite alot of things come up latley that need attention, as we are comming closer to the Grand Opening in June, and still have piles to do. I won't go into too much detail, because I am sure I will write about it again as things progress...
Now, I did mannage to sneak in something crafty... I got the opportunity to make some doll clothes. My boss's daughter got a new American Girl Doll for Christmas, and she wanted some new clothes for it. So I spent my day off sewing a very cute doll jacket, hat and boots, all trimmed with pink pom-poms. I delivered them the other day, and today I got a card from Kailey to thank me for the outfit. It was cute, and I am a little suspicious that she spent as long on making the card, as I did making the outfit! I scanned the card to share it here.


Friday, 13 January 2012
The finished hat
For some reason, I can not take a decient picture of this hat. Its hard to see the texture. But, this is Jamies hat completed. I will try to get a picture of it on his head and see it that helps.


Thursday, 5 January 2012
Still with the knitting……
Julie Says:
Well, I finally finished Jamie’s socks. For everyone who doesn’t know, they were the last pair in a long line of Christmas socks. I have knit way too many socks lately. So, of course, the first project I start after all those socks… more socks! I couldn’t help it. I found some really nice yarn, by Kraemer Yarns, its a cotton/acrylic/nylon fingering weight yarn, in a nice brown and a cream color. Anyway, it just looked like a pair of socks. They are taking a long time, this is the first pair of socks I have knit with actual sock yarn and teeny tiny needles.

In the mean time, I had finished Jamie’s socks yesterday, and started a hat. I let him pick the pattern on www.ravelry.com. It is a top down pattern, and looks like it will be a nice hat, but is currently a big tangled mess on the needles. To start with I didn’t have a circular needle in the right size so I am using 4 DPN’s, which barely hold the stitches. They are bursting at the ends.
http://www.ravelry.com/patterns/library/quest-for-a-man

I can’t help but think, when I am starting a new pattern (which I hardly ever use, by the way) that knitting with a pattern is a lot like getting a new set of Lego. You have a complicated bunch of instructions that have you building bits of things that you don’t know yet how will fit together, but blindly build anyway, until eventually the whole thing starts to look like something. But with knitting, you don’t get all your pieces in pre-sorted baggies… you get a couple pairs of chopsticks and a ball of string and have to make your own.
I guess this is why I knit so many socks, I don’t need a pattern for socks!
Monday, 2 January 2012
Quick Gift Idea: Family Portrait
Jeni says:

This year, my husband, kids, inlaws and I went to Flordia for Christmas. We spent the better part of the year planning the trip, and went for 11 days, returning on the 23rd of December. During the planning stages, my mother in law asked me to design 'group t-shirts' for us to wear in Disney World. So I came up with this design. It is very easy to make, and can be used in numerous ways. You dont have to be an artist to draw it out, and you dont have to be crafty to get the design onto the shirt. Just follow these steps below and you will be finished in no time.
I have two examples you can look at to draw from, or make up your own people designs. We wore our Christmas shirts on the Disney Cruise ship, and the Mickey Mouse shirts to Disney world, and got piles of complements on both sets.

I also printed out the Christmas design, and framed it for my Inlaws for Christmas. There are alot of things you can do with this idea. You can do birthday party shirts for kids parties, wedding party shirts for wedding showers, group tshirts for vacations, or frame them for gifts. How about a wedding party drawn in thier wedding colors and framed into a wide matted frame for guests at a wedding to sign? or a group drawing for a retiring co-worker?
How to:
1. Start with an 8x10 sheet of printer paper. If your design is bigger than this, it will not fit on the kids size shirts. Lay the paper horizontally, and draw a line with a ruler about 2 inches from the bottom of the page.
2. Measure the height of each person and draw a line where the top of each head should be.The adults should be the same height, to indicate they are adults. Children`s heights should be drawn according to age, not actual height. Babies will be smallest, then toddlers/preschoolers, then children under ten, and children over ten.
3. Draw the heads as a circle shape, and should take up 1/3 of the allotted space. Next draw in the boddies in a rectangular shape, branching off the bottom of the head. Arms and legs are sticks with a small loop to indicate hands and feet.
4. Once the heights and base shapes are finishes, lightly sketch over to add the faces, hair, and clothing. The simpler you make these, the neater your design will be. You can dress your characters up for a special occassion, as I have done with the Christmas shirt, or try to reflect each person's style. Just remember, it doesnt have to be perfect... it is suppose to look like a child drew it!
5. When you are happy with your design, trace over the final lines with a black marker. Then cover the page with another sheet of paper, and trace the entire design onto the new sheet. This will give you a nice clean copy with no eraser marks or pencil lines.
6. Add the lettering. Do it free hand if you have neat printing... but I opened a word document, chose a font I liked, typed out my wording, and traced it onto my final copy. Remember to label each person with their name.
7. You have three options on this step:
a) color the picture with markers or crayons.
b) scan the picture, open the file in photoshop (or your paint program) and color the picture with the fill tool.
c) leave the design black and white and let the kids color it with fabric markers.
8. Flip the design to the mirror immage. I did it on photoshop but most photo programs will let you do this, as will alot of printers. You have to do this, or your transfer will print backward on your shirt.
9. Print the design onto the iron on transfers. Then follow the instructions on the transfer package.

This year, my husband, kids, inlaws and I went to Flordia for Christmas. We spent the better part of the year planning the trip, and went for 11 days, returning on the 23rd of December. During the planning stages, my mother in law asked me to design 'group t-shirts' for us to wear in Disney World. So I came up with this design. It is very easy to make, and can be used in numerous ways. You dont have to be an artist to draw it out, and you dont have to be crafty to get the design onto the shirt. Just follow these steps below and you will be finished in no time.
I have two examples you can look at to draw from, or make up your own people designs. We wore our Christmas shirts on the Disney Cruise ship, and the Mickey Mouse shirts to Disney world, and got piles of complements on both sets.

 |
| Our Photo as we boarded the ship! |
How to:
1. Start with an 8x10 sheet of printer paper. If your design is bigger than this, it will not fit on the kids size shirts. Lay the paper horizontally, and draw a line with a ruler about 2 inches from the bottom of the page.
2. Measure the height of each person and draw a line where the top of each head should be.The adults should be the same height, to indicate they are adults. Children`s heights should be drawn according to age, not actual height. Babies will be smallest, then toddlers/preschoolers, then children under ten, and children over ten.
3. Draw the heads as a circle shape, and should take up 1/3 of the allotted space. Next draw in the boddies in a rectangular shape, branching off the bottom of the head. Arms and legs are sticks with a small loop to indicate hands and feet.
4. Once the heights and base shapes are finishes, lightly sketch over to add the faces, hair, and clothing. The simpler you make these, the neater your design will be. You can dress your characters up for a special occassion, as I have done with the Christmas shirt, or try to reflect each person's style. Just remember, it doesnt have to be perfect... it is suppose to look like a child drew it!
5. When you are happy with your design, trace over the final lines with a black marker. Then cover the page with another sheet of paper, and trace the entire design onto the new sheet. This will give you a nice clean copy with no eraser marks or pencil lines.
6. Add the lettering. Do it free hand if you have neat printing... but I opened a word document, chose a font I liked, typed out my wording, and traced it onto my final copy. Remember to label each person with their name.
7. You have three options on this step:
a) color the picture with markers or crayons.
b) scan the picture, open the file in photoshop (or your paint program) and color the picture with the fill tool.
c) leave the design black and white and let the kids color it with fabric markers.
8. Flip the design to the mirror immage. I did it on photoshop but most photo programs will let you do this, as will alot of printers. You have to do this, or your transfer will print backward on your shirt.
9. Print the design onto the iron on transfers. Then follow the instructions on the transfer package.
Subscribe to:
Posts (Atom)